
I suppose this is also a sneak peek of a bedroom I'm in the process of doing (almost done!). This bedroom is a guy's (college age) room, so I got to go more masculine than some of my other bedroom makeovers. I'll have lots of pictures of that in full, soon.
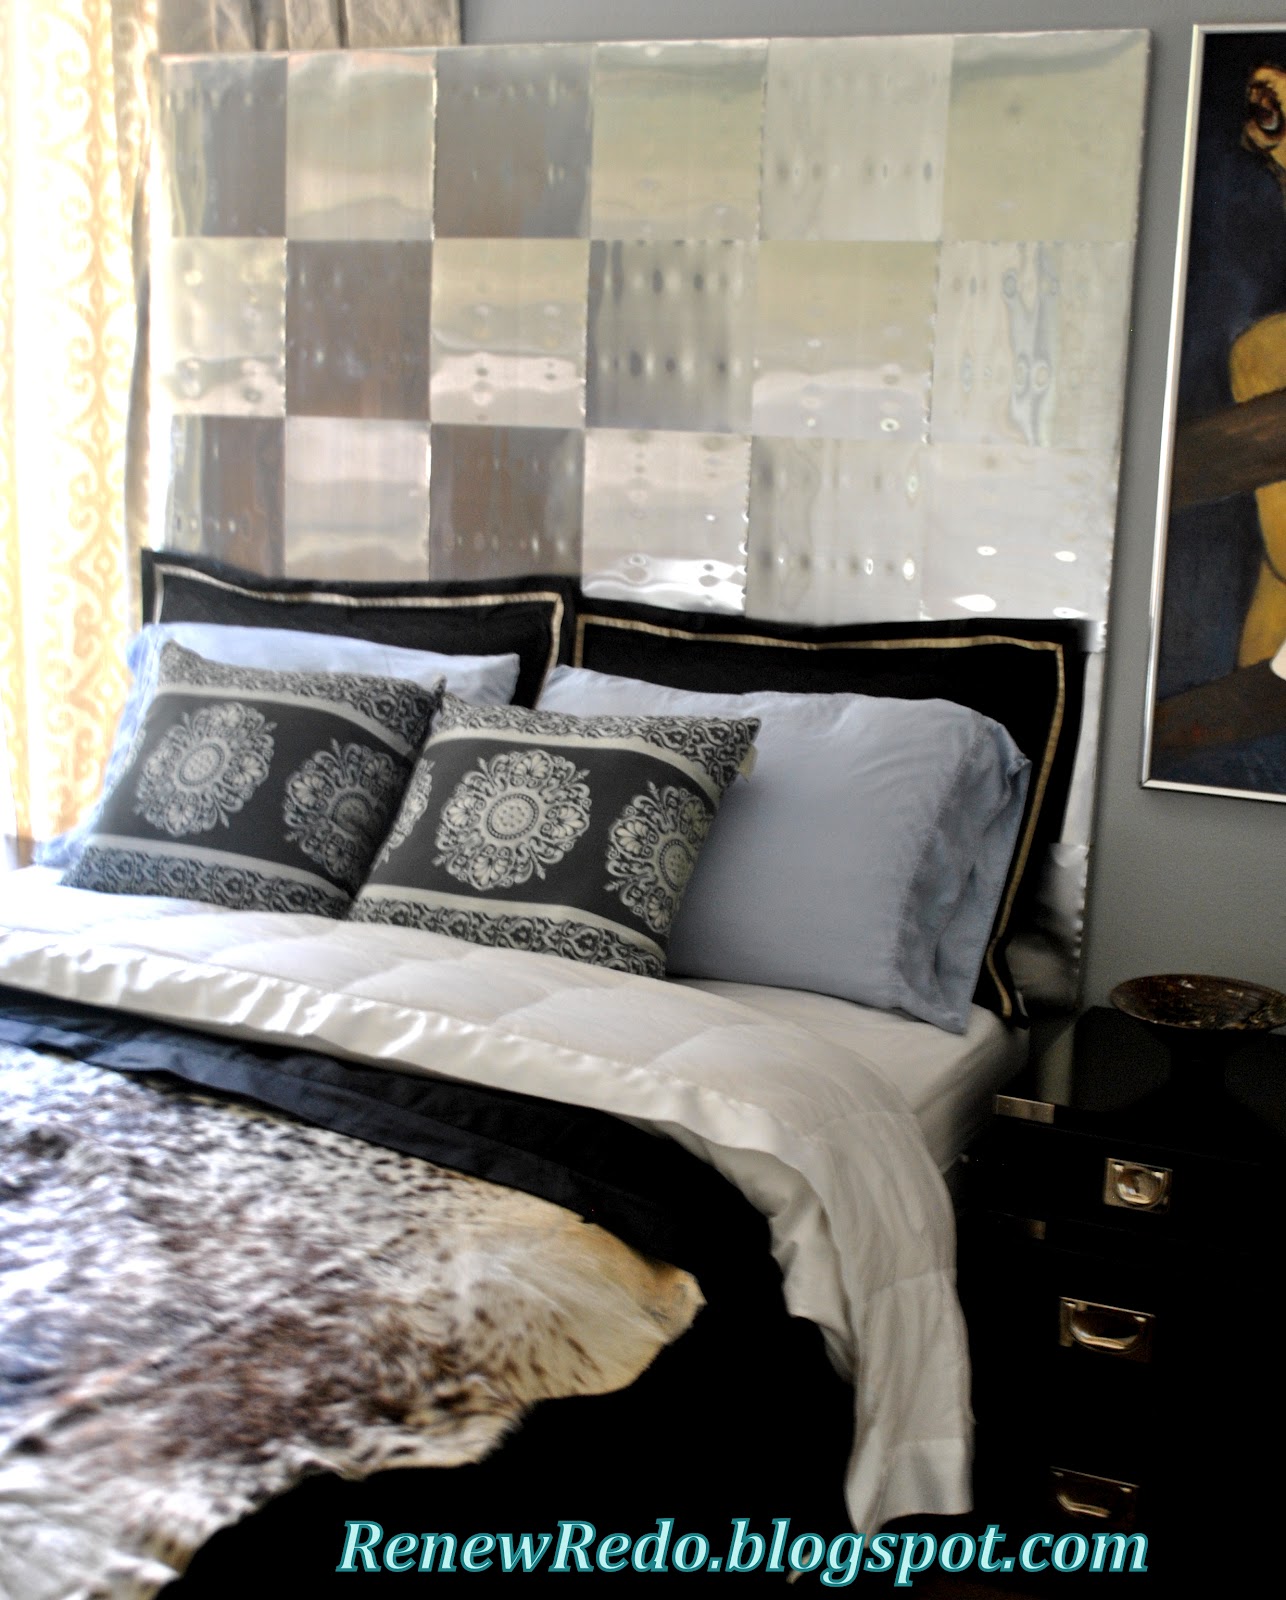
So back to the headboard. Aluminum Flashing looks like this. In case you've missed it in some of my previous posts.

You can pick it up at your local hardware store. I got mine from Lowe's, one of my most favorite stores, in the roofing asle. It comes in different widths and lengths. I used a 50' roll to make this headboard and came up one strip short of a complete queen headboard. Luckily I had an extra piece left over from one of my previous projects. One thing I noticed is the 50' roll seems to be a little thinner metal than the 10' foot rolls. The 50' roll has indentions in it. The 10' rolls don't, they are very smooth. I was good with that though, thought it made it more interesting. Oh... and you can sand this stuff with very fine sandpaper to make it less shiny if you like that look. Just test your sanding skills on an extra piece of flashing before you start on the headboard to make sure you like it. It can leave swirl marks if you're not careful.

All you need to do this project is a piece of MDF board, that you can have cut to size at the store (Lowe's, Home Depot....), aluminum flashing and a staple gun. Not the paper stapler, but the big daddy one.
This was a queen size headboard, so my dimensions were 4' tall by 5' wide. One piece of MDF board is 4' x 8', so I only had to make one cut. Next, cut the aluminum flashing to size. I used the 10" width so needed 11 strips. 6 horizontally and 5 vertically for the basket weave look. Hopefully my crappy little diagram below will give the idea. heehee. Just weave the flashing strips over, under, over, under, over under... and so on, then do the next strip in the opposite order...

Leave an extra 2" on all sides to bend around to the back of the MDF board for your staples. You'll need books or something kinda heavy to put at the ends of your flashing as you lay it out to keep it from rolling up. I laid out and weaved all the flashing on the floor then laid the MDF board on top, then used a hammer to help bend the flashing to make it good and flat around all the sides, and stapled everything down. Make sure all your strips are butted up against each other before you staple. There should be no gaps between the strips.
Flip it over and you're all done. Snazzy and less than a hundred bucks.
So what do you think??
Smiles!
~Renew Redo~

looks great
ReplyDeleteThanks!!
DeleteSmiles!
Great smile in your little profile pic thingie there! : )
Sammy ~ Renew Redo
When I saw this I instantly thought it make an awesome accent wall or some sort of "layering" like put behind a credenza or something. I kept thinking about it and then I was like meh never gonna do it anyway, haha. But I do think it look awesome!!!
ReplyDeletelol, you're too funny! I agree with you on the wall thing, that thought has definitely popped into my mind too. Who knows you may see something like that pop up on this little bloggy blog here. You know how I find something I like and put it on every possible surface under the sun! lol ; )
DeleteSmiles!
Sammy ~ Renew Redo
UNBELIEVABLE! you are seriously amazing w/ what you take on! submit this to design*sponge, please!!
ReplyDeletedo you wear gloves? i think i'd end up bleeding all over this stuff!
Awhhh, thanks Amy!! You are always such a supportive fellow blogger. Just makes me want to give you a big bloggy hug!
DeleteNo I don't wear gloves. The edges aren't as sharp as you might think. The only thing is if you cut it and leave a jagged edge then watch out baby cuz that shmarts, but good clean straigt cuts, no worries. : )
Smiles!
Sammy ~ Renew Redo
Beautiful, Mama!!!
ReplyDeleteThanks Mama! Always love to see your name pop up, my little BBF
DeleteSmiles!
Sammy ~ Renew Redo
How did you attach it to the wall? I thought a french cleat, but it looks flush to the wall. Looks fabulous!
ReplyDeleteHey there! Ooops, sorry, I must have missed this question.
DeleteI used picture hanging hardware on the back of the mdf board. Hope that helps! : )
Smiles!
Sammy ~ Renew Redo
It looks like it was "aged"? how did you accomplish it?
ReplyDeleteThat aluminum flashing headboard really works, Sammy! It made the bedrail looks sturdy, and it gives the room a very post-modern personality. I hope that it retains its sheen for a long time, so that it continues to work from the vantage of design.
ReplyDeleteBernice Parsons @ Badger Anodising
Hi there. I love this and planning on doing this as we remodel ourbedroom. I was wondering how the flashing looks different colors? Did sand it? Thanks!
ReplyDelete
ReplyDeleteThanks for your informative writing.
Get 30%-70% Discount from FZillion.com on all branded Bed Cover . You can get excellent product with Great discount from Amazon and Ebay
USA Free shipping and free return. 75 days Return Policy.
Hi! Thanks for the great information you havr provided! You have touched on crucuial points! bed banging
ReplyDeleteI wish more authors of this type of content would take the time you did to research and write so well. I am very impressed with your vision and insight. Bronze Dice
ReplyDeleteI’ve read some good stuff here. Definitely worth bookmarking for revisiting. I surprise how much effort you put to create such a great informative website. Aluminum Titanium Boron Coil
ReplyDeleteThis is such a great resource that you are providing and you give it away for free. I love seeing blog that understand the value of providing a quality resource for free. PCB
ReplyDeleteLove this post! This is a really good blog wish more people would read this, you offer some really good suggestions on Aluminum Cleaner. Thanks for sharing.
ReplyDeleteThese HDPE duct spacer suppliers play a vital role in the construction and HVAC industries by providing innovative solutions for efficient duct installation. Their high-density polyethylene spacers are not only durable and lightweight but also designed to enhance airflow and support the integrity of duct systems. It's impressive to see suppliers focusing on quality and reliability, ensuring that their products meet industry standards and help contractors achieve optimal performance in their projects. By offering such essential components, they contribute significantly to improving energy efficiency and system longevity. Keep up the fantastic work in supporting the industry with top-notch products.
ReplyDeleteThe Polypropylene fabric price In India is a strong, durable, and lightweight material made from polypropylene strips woven together to form a flexible fabric. Known for its high tensile strength and resistance to moisture, chemicals, and wear, PP woven fabric is widely used in packaging, agriculture, construction, and geotextile applications. It is an ideal solution for creating sacks, tarpaulins, ground covers, and more. This eco-friendly and cost-effective fabric is easily customizable and offered in various GSMs and colors to suit diverse industrial needs.
ReplyDelete